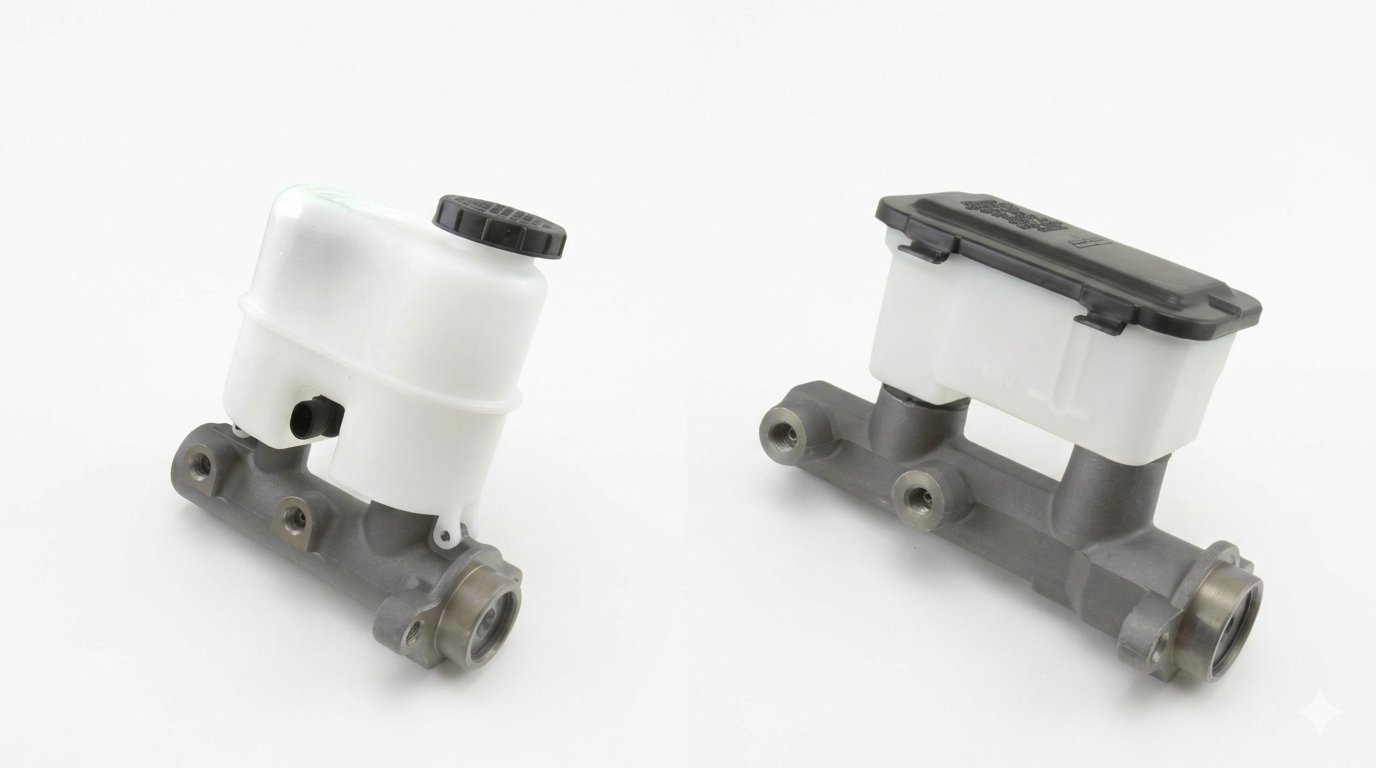
The iconic “mushy” brake pedal on vacuum-boosted GMT400 trucks isn’t a design flaw or an accidental failure of aging parts—it is the deliberate side effect of GM’s early “Low-Drag” braking architecture.
If you own a vacuum-boosted GMT400 (1988–1998 Chevrolet/GMC C/K series truck or SUV), hitting the brakes can often feel like stepping on a wet sponge. One of the most popular, cost-effective upgrades to combat this is swapping in a master cylinder from a Newer Body Style GMT800 (NBS, 1999–2006) truck. By bolting a GMT800 master cylinder onto your Old Body Style (OBS) vacuum booster, you can drastically transform your braking feedback.
Why the Factory GMT400 Pedal Feels Spongy
To understand why this swap works, you have to look at how GM engineered the vacuum-boosted brake systems differently from the heavy-duty Hydroboost systems during the 1980s and 1990s.
1. Low-Drag Calipers
In a bid to satisfy tightening federal fuel economy mandates, GM designed half-ton and light-duty GMT400 trucks to have as little rolling resistance as possible. Traditional brake calipers keep the pads in microscopic proximity to the rotor. GM’s low-drag calipers, however, utilized modified seal retraction geometry to pull the brake pistons and pads significantly further back away from the rotor when you let off the pedal. This minimized parasitic brake drag to boost fuel economy, but it introduced a massive physical gap that the brake pads had to bridge before they could start stopping the truck.

2. The “Quick Take-Up” (Step-Bore) Master Cylinder
To bridge this wide physical gap instantly without requiring the driver to pump the pedal twice, GM utilized a highly specialized, three-chamber “Quick Take-Up” master cylinder.
Instead of a perfectly straight internal bore, these master cylinders use a stepped bore (featuring a large primary bore, transitioning down to a smaller 1.125-inch bore).
- Stage 1 (The Surge): When you initially step on the pedal, the oversized, large-diameter section of the piston acts as a high-volume pump. It rapidly shunts a massive volume of low-pressure fluid down the lines to instantly force those retracted “low-drag” caliper pistons out across the gap until the pads slap against the rotors.
- Stage 2 (The Pressure): Once the pads hit the rotor, hydraulic resistance builds. An internal bypass/check valve inside the master cylinder opens, venting the large volume chamber and allowing the smaller 1.125-inch bore to take over. This smaller bore provides the high hydraulic pressure necessary to actually squeeze the rotors and halt the truck.
The “mushy” take-up you feel in a standard GMT400 is the physical sensation of that first stage bypass valve opening and transitioning the fluid volume. Because the check valve is designed to vent pressure during the initial take-up stroke, the pedal feels soft and travels deeply before hard hydraulic pressure finally firms it up.
The GMT800 Solution: Straight-Bore Physics
When you perform the GMT800 swap, you are replacing the complex, multi-stage step-bore master cylinder with a modern, straight-bore (single-stage) cylinder.
- GMT400 Factory Cylinder: Stepped bore terminating at 1.125 inches.
- GMT800 Master Cylinder: Continuous straight bore of 1.3 inches.
A larger, straight piston bore moves a higher volume of fluid continuous from the top of the stroke with less physical travel. Because it completely eliminates the “Quick Take-Up” valve mechanics, the instant firmness comes because you are feeling direct fluid compression right from the second your foot applies force.
The Mechanical Trade-Off
While a firm pedal feels great, it is vital to understand hydraulic leverage: moving more volume means you sacrifice line pressure for a given amount of leg force. Because the bore is wider, you have less force multiplication. In everyday driving, the brakes feel phenomenal because the fluid reaches the pads immediately. However, in an absolute panic stop, you will actually have to push the pedal significantly harder to lock up the brakes compared to the factory setup.
Additionally, the GMT800 cylinder was designed for four-wheel disc systems. If your GMT400 still has rear drum brakes, installing it without an adjustable proportioning valve can sometimes cause an unsafe braking bias during emergency stops.
Why Hydroboost Trucks Don’t Need This Swap
Heavy-duty GMT400 trucks (such as the JB7 and JB8 brake packages found on 2500/3500 series trucks and certain diesel/big-block applications) bypassed this entire convoluted setup from the factory.
1. Traditional Calipers (No Low-Drag)
Heavy-duty commercial trucks and duallys prioritized absolute stopping power over minute fuel economy gains. Because of this, heavy-duty GMT400s were equipped with traditional, heavy-cast calipers that did not retract far from the rotor.
2. Standard Straight-Bore Master Cylinder
Since there was no massive physical gap to bridge, Hydroboost trucks never received a 3-chamber “Quick Take-Up” master cylinder. Instead, they utilized a traditional, heavy-duty, straight-bore master cylinder (usually with a solid 1.25-inch bore).
Combined with the raw mechanical muscle of the power-steering-pump-driven Hydroboost unit—which generates upwards of 2,000+ PSI compared to the meager ~900 PSI of a vacuum booster—the heavy-duty trucks never suffered from a multi-stage pedal drop. The pad was always right next to the rotor, and the straight hydraulic bore meant that pedal application was linear, immediate, and firmly controlled. Putting a 1.3-inch GMT800 cylinder on a Hydroboost truck unbalances these hydraulic ratios, forcing your leg and the hydraulic pump to fight lower line pressures unnecessarily.
Installation Guide: GMT800 Master Cylinder onto GMT400 Vacuum Booster
This guide outlines how to adapt a 1999–2006 GMT800 master cylinder onto a 1988–1998 GMT400 vacuum booster.
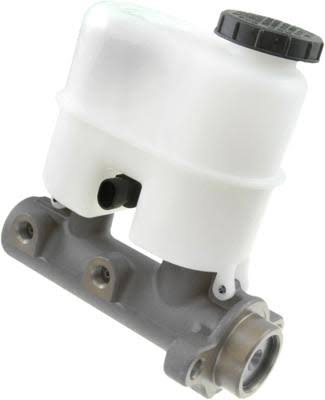
Parts & Tools Required
- GMT800 Master Cylinder: (e.g., Replacement for a 2002 Chevy Silverado 1500)
- Brake Line Adapter: Front port adapter flare fitting (Typically 1/2-20 Inverse Flare Male to M18x1.5 Bubble Flare Female, such as AGS BLF-26C)
- Brake Fluid: Fresh DOT 3 or DOT 4 fluid
- Tools: Bench bleeding kit, line wrenches (10mm, 13mm, 15mm, and standard fractional sizes), brake bleeding wrench, and shop rags.
Step 1: Bench Bleed the New Master Cylinder
- Secure the new GMT800 master cylinder in a bench vise (clamp it by the mounting flange, not the fluid reservoir body).
- Install a bench bleeding kit, routing the plastic tubes from the fluid ports back up into the reservoir.
- Fill the reservoir with fresh brake fluid, ensuring the ends of the tubes are fully submerged.
- Using a blunt tool or large screwdriver, slowly depress the master cylinder piston inward, then let it return.
- Repeat this process until you see zero air bubbles escaping from the tubes into the reservoir.
Step 2: Remove the Old Master Cylinder
- Place shop rags underneath the factory master cylinder to catch corrosive brake fluid.
- Disconnect the electrical connector from the fluid level sensor.
- Using dedicated line wrenches, carefully loosen and disconnect the front and rear brake lines from the master cylinder.
- Remove the two mounting nuts holding the master cylinder to the vacuum booster.
- Pull the old master cylinder straight off the booster studs.
Step 3: Modify and Fit the Brake Lines
The GMT400 vacuum booster studs line up perfectly with the GMT800 master cylinder ears, making it a direct physical bolt-on. However, the hydraulic port thread pitches differ.
- Clean the face of the vacuum booster mounting surface.
- Slide the new, bench-bled GMT800 master cylinder onto the factory booster studs. Secure it using the original mounting nuts.
- Install your thread adapter (e.g., AGS BLF-26C) into the front fluid port of the master cylinder.
- Gently manipulate and align the factory steel brake lines to line up with the new port configurations. Take care not to kink the steel lines while slightly bending them into position.
- Thread the brake line fittings in by hand first to prevent cross-threading, then tighten them securely with a line wrench.
Step 4: Bleed the Vehicle’s Brake System
Because air was introduced into the system lines during the swap, a full system bleed is mandatory.
- Ensure the master cylinder reservoir remains topped off with fresh fluid throughout this entire process.
- Instruct an assistant to pump the brake pedal and hold it down.
- Starting at the furthest wheel from the master cylinder (Passenger Rear), open the bleeder valve to let air and old fluid escape, then close it before your assistant releases the pedal.
- Repeat this sequence until the fluid runs completely clear and bubble-free.
- Move through the remaining wheels in the standard sequence: Driver Rear, Passenger Front, and finally Driver Front.
Step 5: Test and Inspect
- Reconnect the fluid level sensor wiring harness (if compatible, or tie it out of the way if deleting the sensor connection).
- Clean up any spilled brake fluid on painted surfaces immediately with brake cleaner or water.
- With the truck running in a safe area, press the brake pedal firmly to confirm there are no leaks at the fitting adapters.
- Conduct a low-speed test drive to adapt to the new, significantly firmer pedal engagement point.
Detailed Specifications
Basic Description
- Bore Type: Straight Bore (Single Stage)
- Bore Diameter: 1.30 in (33mm)
- Target Caliper Style: Standard Disc (Low-Drag deleted)
- Pedal Take-Up Feel: Instant / Firm
- Assist Type Compatibility: Engine Vacuum Booster
Thread & Port Configuration
- Rear Port Thread: M12 x 1.0 Bubble Flare
- Front Port Thread: M18 x 1.5 Bubble Flare
- Required Adapter for Front Port: 1/2-20 Inverse Flare Male to M18x1.5 Bubble Flare Female (AGS BLF-26C)
Hydraulic Pressure Output (Estimated Comparison)
| Assist Type / Master Setup | Average Operating PSI | Pedal Feel / Travel Characteristics |
|---|---|---|
| Factory Vacuum + Step-Bore Master | ~900 PSI | Soft, deep initial take-up before bite |
| Factory Vacuum + GMT800 Swap | ~750-800 PSI | Firm, highly linear, short travel; high leg effort in panic stops |
| Factory Hydroboost + Stock 1.25″ Master | 2,000+ PSI | Immediate, extremely firm, maximum stopping power |
Conclusion
For owners of a vacuum-boosted half-ton GMT400, the GMT800 master cylinder swap occupies a unique place in OBS truck modification history. It was never a factory-engineered performance upgrade, but it delivers something entirely different: a modern, highly responsive pedal feel that eliminates the annoying multi-stage step-bore lag.
With its roots in the simple hydraulic design of the later heavy-duty applications, the GMT800 cylinder bypasses the complex low-drag architecture that makes aging GMT400 brakes feel so approachable yet frustrating. Like many modifications offered for the GMT400 platform, the swap has its known mechanical compromises—specifically involving reduced hydraulic leverage and rear drum balance concerns—but these trade-offs are well understood and can be easily addressed with proven line configurations or an adjustable proportioning valve. For those willing to maintain and dial it in, the GMT800 master cylinder swap remains a capable and affordable upgrade that fits naturally within the GMT400 platform.
